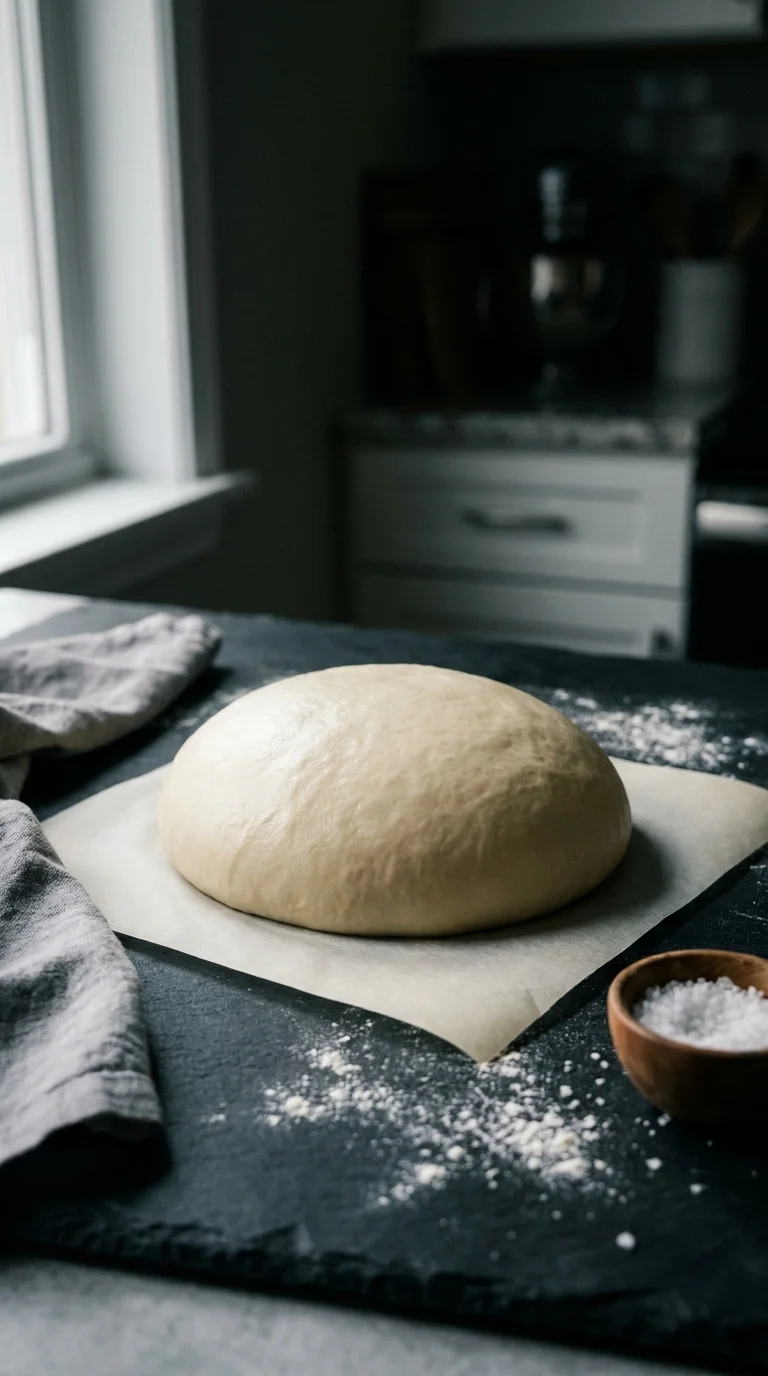
The soul of an artisan pizza dough lies in the ancient tradition of slow fermentation, a practice perfected over centuries in the heart of Naples. By allowing the yeast to work slowly over many hours, the sugars in the flour break down, creating those characteristic charred bubbles and a complex, slightly tangy flavor profile.
Unlike modern commercial doughs that rely on chemical accelerators, the traditional method emphasizes high hydration and time. This process develops a strong gluten network, which allows the crust to stretch thin without tearing while maintaining a sturdy, chewy structure. It is a dance between temperature and patience.
Culturally, pizza began as a simple meal for the working class, utilizing basic pantry staples to create something nourishing and satisfying. Today, the pursuit of the perfect "cornicione"—the puffed-up outer rim—remains a point of pride for bakers worldwide, bridging the gap between humble street food and culinary art.
Why You'll Love It
-
- Honestly, those big, bubbly blisters on the crust are just everything; it feels like a real bakery right in your own kitchen.
-
- I love how the long wait makes it, well, it just develops this deep, soulful flavor that you simply can't get from a quick dough.
-
- It's got that wonderful contrast, you know? A crisp, toasted bottom but a chewy, al dente center that's just so satisfying.
-
- Look, it might take a bit of patience, but seeing your family's faces when you pull out a professional-looking pie makes it all worth it.
"I was nervous about the long wait, but oh my, the flavor is incredible. It actually tastes like a real pizzeria!"
Essential Ingredient Guide
- 500g bread flour (≈4 cups): I always reach for bread flour because the higher protein gives it that lovely chew. It's what keeps the dough from just collapsing into a pancake, believe me.
- 400g lukewarm water (≈1 2/3 cups + 1 tbsp): The temperature is key here; you want it just warm enough to wake up the yeast without startling it. It makes the dough so supple and easy to work with.
- 10g extra‑virgin olive oil (≈1 tbsp): This adds a gentle, fruity note and helps the crust brown beautifully. It also keeps the dough from sticking too much to your hands, which is a relief.
- 10g sea salt (≈2 tsp): Don't skip this, because salt is what actually brings out all those complex wheat flavors. I like to sprinkle it in carefully so it blends right in.
- 5g instant dry yeast (≈1 tsp): This little bit of magic is what gives us those airy bubbles. I just let it sit with the flour for a minute first, just to make sure it's ready to go.
- Cornmeal: Using a bit of this on your peel is just a lifesaver. It acts like tiny ball bearings so your pizza slides right onto the stone without any oops moments.
Complete Cooking Process
-
Ingredient Readiness:
We start by weighing everything precisely—scales are so much more honest than cups. The yeast gets a moment to settle in the flour before the lukewarm water brings it all together.
-
Flavor Development:
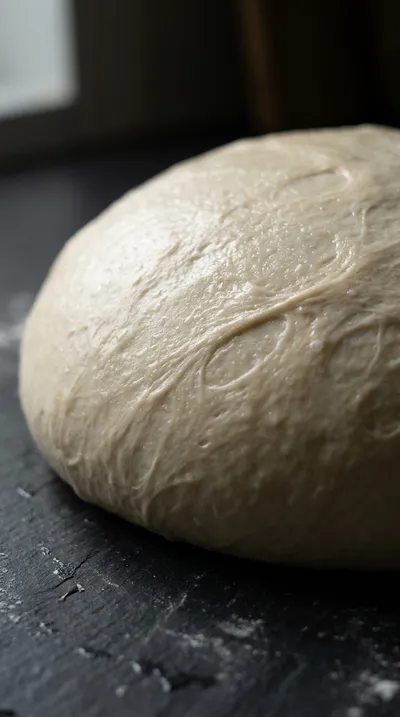
The real magic happens during that long 18-hour nap in the fridge. It's a slow process, but that's how you get those deep, artisan flavors and a complex crumb.
-
Texture Control:
Kneading for 8-10 minutes until you see a faint windowpane is where the structure happens. Then, letting the dough come back to room temperature ensures it stretches without snapping back.
-
Finishing Touches:
A quick flatten into a 10-inch circle, leaving the edges a bit thicker for that classic crust. Then we just add our favorite toppings and slide it onto a screaming-hot stone.
-
Serving Timing:
Wait just 2 minutes after it leaves the oven so the cheese sets. I love a final drizzle of high-quality olive oil and a few fresh basil leaves right before slicing.
-
Use bread flour with at least 12% protein for a chewier crumb and better structure.
-
Keep the pizza stone very hot—if you hear a popping sound when the dough hits, it's ideal.
-
Don't overwork the dough after the final rest or you'll deflate those lovely bubbles.
-
If you're using a stone, preheat your oven for at least 45 minutes to get it truly hot.
Pro Tips
Just trust your instincts and enjoy the process, you've got this!
 Quick & Easy Everyday Recipes
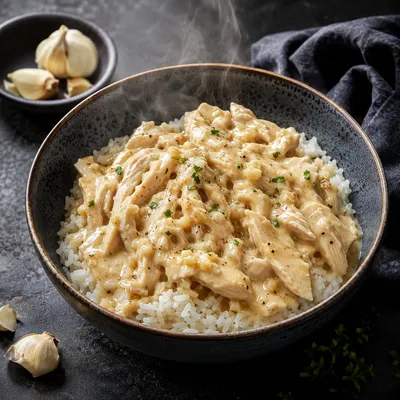
Creamy Garlic Chicken Rice Bowls
Tender chicken, garlicky cream sauce, and soft rice make a quick, comforting bowl.
Better For You Treats
While this is a hearty treat, I like to keep it mindful. You can replace 25% of the 500g bread flour with whole-wheat flour for a nuttier taste and a bit more fiber for the family.
Ways to Make it Your Own
I sometimes stir in a tablespoon of fresh rosemary or oregano during the kneading stage for an earthy scent. Or, feel free to play with the toppings—maybe some caramelized onions and arugula for something a bit fancier.
Serving Suggestions
A classic Margherita with fresh mozzarella is always a win, but a white garlic pizza with ricotta and spinach is so cozy. Serve them on a wooden board for that rustic, homey feel.
Frequently Asked Questions
→ Can I make this dough in a shorter amount of time?
Well, you could, but you'll miss out on those beautiful bubbles and that deep flavor. The long ferment is really what makes it "artisan."
→ What if my dough is too sticky to handle?
Don't panic! Just use a little more flour on your hands and surface, but try not to add too much into the dough itself or it'll lose its lightness.
→ Do I really need a pizza stone?
A cast-iron skillet works just as well, honestly. The goal is just to have a surface that holds a lot of heat to crisp up the bottom.
Nutrition Facts
per serving
375
Calories
15g
Protein
62g
Carbs
6g
Fat
Taste Profile
A balanced, savory dough with a deep, fermented complexity.
Ingredient Substitutions
Don't have an ingredient? Try these alternatives
The crust will be softer and less chewy due to lower protein.
Must be dissolved in the lukewarm water first before adding to flour.
Recipe Variations
Try these delicious twists on the original
Herb‑Infused Dough
For an earthy, aromatic twist, add 1 tablespoon of chopped fresh rosemary or oregano during the kneading process in step 3.
Whole‑Wheat Base
For a nuttier flavor and a bit more fiber, replace about 25% of the bread flour with whole‑wheat flour, while keeping the hydration at 80%.
Common Mistakes to Avoid
Learn from others' mistakes for perfect results
- Adding water too early before the yeast has had a moment to sit on the flour.
- Skipping the room temperature rest after the fridge, which leads to a tough, springy dough.
- Over-kneading the dough after the final rise, which pops all those lovely air bubbles.
Meal Prep & Storage
Make Ahead Tips
This recipe is designed for making ahead; the dough actually requires an 18-hour cold ferment in the fridge to reach its full flavor potential.
Leftover Ideas
Freeze uncooked dough portions tightly wrapped for up to 3 months. Thaw in the fridge overnight before bringing to room temperature for baking.
Perfect Pairings
Serve this with...
Cooking Timeline
Mix flour and yeast, then add water and autolyse for 20 minutes.
Add salt and oil, then knead for 8-10 minutes until smooth.
Bulk fermentation at room temperature for 6 hours.
Divide into balls and cold ferment in the fridge for 18 hours.
Warm dough, preheat oven, shape, top, and bake.
 Quick & Easy Everyday Recipes
Honey Baked Salmon – Easy & Delicious
Honey‑baked salmon with a sweet‑savory glaze, ready in under thirty minutes.
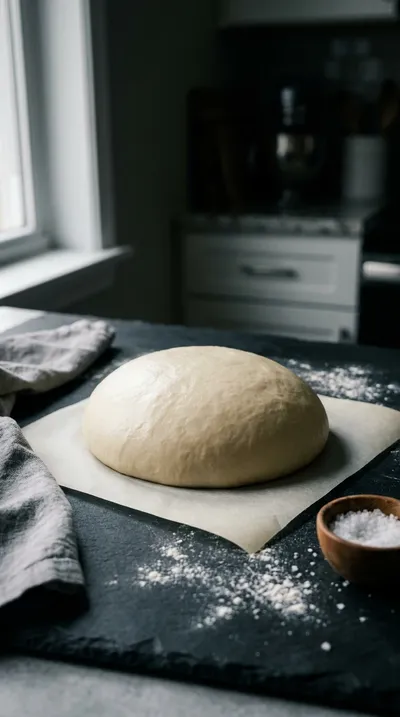
Artisan Pizza Dough – Crispy, Chewy, Bubbly Crust
Imagine a golden, blistered crust that crackles under your teeth before giving way to a soft, airy center. This artisan pizza dough blends simple staples like 500g bread flour and 400g lukewarm water to create a professional-grade base right in your own kitchen.
Timing
Prep Time
45 Minutes
Cook Time
12 Minutes
Total Time
1512 Minutes
Recipe Details
Ingredients
Main Ingredients
-
01
500g bread flour (≈4 cups)
-
02
400g lukewarm water (≈1 2/3 cups + 1 tbsp)
-
03
5g instant dry yeast (≈1 tsp)
-
04
10g sea salt (≈2 tsp)
-
05
10g extra‑virgin olive oil (≈1 tbsp)
Instructions
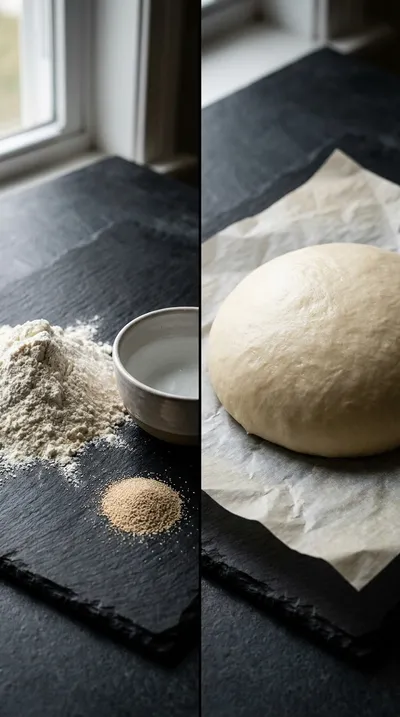
Start by weighing your 500g bread flour into a large bowl. Now, just gently sprinkle the 5g instant dry yeast over the flour. Honestly, don't add the water just yet; let the yeast sit there for about a minute to get itself activated and ready.
Pour in your 400g lukewarm water. Using a silicone spatula or a dough hook on low speed, stir it all together until you have a shaggy dough. Now, we let it autolyse for 20 minutes. Look, it'll seem a bit jagged and wet, almost like it's not working, but just trust the process—it'll come together when you press it with your fingertips.
Sprinkle the 10g sea salt evenly over the dough and mix for about 30 seconds. Add the 10g extra‑virgin olive oil and knead on medium speed—or by hand if you prefer the feel of it—for 8–10 minutes. You're looking for it to be smooth, elastic, and tacky, but not sticky. I mean, if you can pass a finger through a section and see a faint windowpane, you've nailed it.
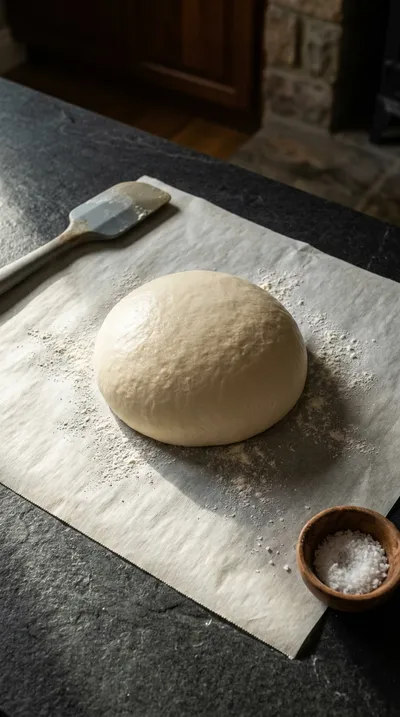
Shape your dough into a rough ball and place it in a lightly oiled shallow container. Cover it with a damp cloth or plastic wrap and let it rest at room temperature (around 75°F/24°C) for 6 hours. Wow, it should roughly double in volume by the time you come back to it.
Gently deflate the dough—don't be too rough—and divide it into four equal portions of about 125g each. Shape them into tight little balls, set them on parchment paper, cover loosely, and pop them in the fridge for 18 hours or overnight. This is where that deep, artisan flavor really happens.
On the day you're ready to bake, take those dough balls out of the fridge. Let them sit at room temperature for 60–90 minutes. You want the inside of the dough to reach about 38°C so it's relaxed and ready to stretch.
Preheat your oven to 500°F (260°C) at least 45 minutes before you plan to bake. Make sure your pizza stone or skillet is on the middle rack so it gets heated through evenly.
On a well‑floured surface, flatten each dough ball into a 10‑inch circle. I like to leave the edges a little thicker for that beautiful crust. Go ahead and top it with your favorite sauce, cheese, and whatever toppings you're craving.
Transfer the pizza onto a pizza peel dusted with cornmeal, or just use the parchment if that's easier. Slide it onto that scorching hot stone or skillet. Bake for 10–12 minutes. Just keep an eye on it until the crust is blistered and the cheese is bubbling away.
Carefully remove the pizza and let it rest for 2 minutes—I know it's hard to wait! Slice it up and serve it hot. I personally love a little drizzle of high‑quality olive oil and some fresh basil on top.
Notes & Tips
-
1
High-hydration doughs are naturally wetter, which is what creates those wonderful airy bubbles.
-
2
The long cold fermentation in the fridge is the secret to a professional, complex flavor.
-
3
Using a pizza stone mimics a brick oven by providing a sudden burst of heat to the bottom crust.

Tools You'll Need
-
Large mixing bowl or stand mixer for combining ingredients
-
Dough hook or wooden spoon for initial mixing
-
Silicone spatula for folding the dough
-
Kitchen scale for precise measurement of grams
-
Plastic storage bag or sealable container for fermentation
-
Parchment paper for easy handling
-
Pizza stone or cast‑iron skillet for a crispy base
-
Pizza peel or flat spatula for transferring to the oven
-
Oven for high-heat baking
Must-Know Tips
-
Bread flour protein, Use bread flour with at least 12% protein for a chewier crumb and better structure.
-
Stone temperature, Keep the pizza stone very hot—if it pops or cracks slightly when dough hits, it's perfect.
-
Handle with care, Don’t overwork the dough after the final rest to avoid deflating those precious bubbles.
Professional Secrets
-
The autolyse period allows flour to fully hydrate, making the dough easier to knead and improving the crumb.
-
Cold fermentation slows down yeast activity, allowing enzymes to break down starches into sugars for better browning.
-
A preheated surface is non-negotiable for achieving a blistered, artisan-style bottom crust.
What readers are saying
Community reviews from home cooks like you
Absolutely loved this recipe! I really liked how the 500g bread flour (≈4 cups) and 400g lukewarm water (≈1 2/3 cups + 1 tbsp) came together. My kids even asked for seconds.
Good, but not amazing. The cups) flavor was nice, but next time i'll double the sauce. I might try it again with some adjustments.
Pretty good overall. The cups) flavor was nice, but i found it a bit sweet for my taste. I might try it again with some adjustments.
This was a hit with my family. I really liked how the 500g bread flour (≈4 cups) and 400g lukewarm water (≈1 2/3 cups + 1 tbsp) came together. My kids even asked for seconds.
Absolutely loved this recipe! I really liked how the 500g bread flour (≈4 cups) and 400g lukewarm water (≈1 2/3 cups + 1 tbsp) came together. Will be making this regularly.
Will definitely make this again. I really liked how the 500g bread flour (≈4 cups) and 400g lukewarm water (≈1 2/3 cups + 1 tbsp) came together. Will be making this regularly.
This was a hit with my family. I really liked how the 500g bread flour (≈4 cups) and 400g lukewarm water (≈1 2/3 cups + 1 tbsp) came together. Saving this for later.
Perfect for a busy weeknight. I really liked how the 500g bread flour (≈4 cups) and 400g lukewarm water (≈1 2/3 cups + 1 tbsp) came together. My kids even asked for seconds.
I wanted to love this dish, but it didn't quite work for me. Next time I'll double the sauce. I think with some tweaks it could be really good.

Recipe by
Alexa CarterFast food, but smarter 🔥🍽️ Bold flavors, simple steps, and meals that always hit the spot 😎
Get Delicious Recipes Weekly
Join 25,000+ home cooks getting our best recipes straight to their inbox.
Free forever • No spam • Unsubscribe anytime