
The origin of these classic no-bake cookies is rooted in the ingenuity of mid-century American home kitchens, where the desire for a sweet treat often clashed with the heat of a summer afternoon. These cookies emerged as a clever solution, utilizing the stovetop to create a cooked syrup that could set without the need for a baking oven.
At their core, the recipe relies on the scientific reaction between sugar, butter, and milk to create a stable, chewy structure. The addition of oats provided a hearty texture that transformed a simple chocolate sauce into a handheld cookie, reflecting the era's move toward more wholesome, filling ingredients in dessert.
Over the decades, the recipe became a staple of childhood nostalgia across the country. It represents a time when cooking was less about precision and more about the rhythmic stirring of a wooden spoon and the patience of waiting for cookies to firm up on a sheet of wax paper.
Today, these treats remain a beloved cultural touchstone, prized for their accessibility and the way they bridge the gap between a candy bar and a traditional biscuit, proving that some of the simplest methods are often the most enduring.
Why You'll Love It
-
- Honestly, there is something so nostalgic about these; they just taste like a warm hug from childhood in every chocolatey bite.
-
- Well, you don't even have to turn on the oven, so it's just a breeze when the house is already warm or you're in a hurry.
-
- I mean, that chewy texture combined with the richness of 1 cup (170g) peanut butter is just... wow, it's absolutely addictive.
-
- Look, it only takes about 10 minutes to put together, which means more time for enjoying them with a cold glass of milk.
"These taste exactly like the ones my grandma used to make. So rich, chewy, and just plain nostalgic!"
Essential Ingredient Guide
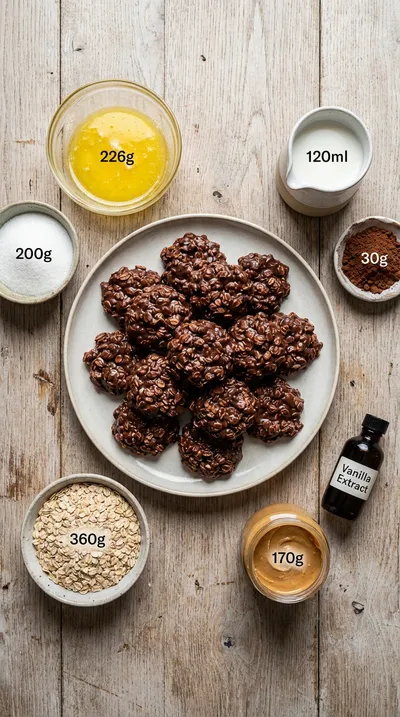
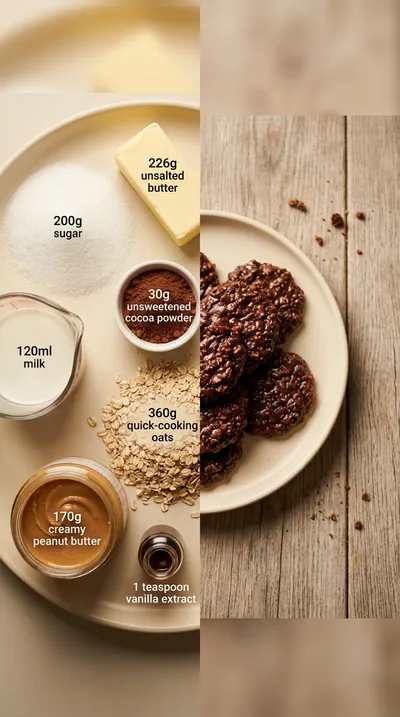
- 3 cups (360g) quick-cooking oats (not instant): These give the cookies that hearty, chewy body we love. Just be sure not to use instant oats, or the texture gets a bit too mushy, and that's just no fun.
- 1 cup (170g) peanut butter (creamy or crunchy): This is where that lovely, salty richness comes from. I personally like creamy, but crunchy adds a nice little surprise in every bite, yeah?
- 1 teaspoon vanilla extract: It's just a small touch, but it rounds out the chocolate and peanut butter beautifully. It adds a gentle warmth that makes the whole batch feel complete.
- 1/2 teaspoon salt: Don't skip this! A little bit of salt cuts through the sweetness of the sugar and makes the cocoa flavor really pop.
- 1/2 cup (120ml) milk: The milk helps everything emulsify into a smooth sauce before we add the oats. It's the secret to getting that glossy, chocolatey finish.
- 1 cup (200g) granulated sugar: This provides the sweetness and helps the cookies set. Just be mindful of the boil time so the sugar doesn't make them too hard.
 Quick & Easy Everyday Recipes
Creamy Garlic Chicken Rice Bowls
Tender chicken, garlicky cream sauce, and soft rice make a quick, comforting bowl.
Complete Cooking Process
-
Getting Everything Ready:
I like to have my 1 cup (2 sticks/226g) unsalted butter and other ingredients measured out first. Since this mixture sets up fast, you really don't want to be digging for a spoon while the pot is hot.
-
Developing the Chocolate Base:
The magic happens when the 1/4 cup (30g) unsweetened cocoa powder and sugar hit that boiling point. It creates a deep, rich syrup that smells just heavenly in the kitchen.
-
Perfecting the Chew:
The timing here is everything, honestly. Boiling for exactly 1 minute ensures the cookies aren't too soft or too crumbly—it's all about that precise little window.
-
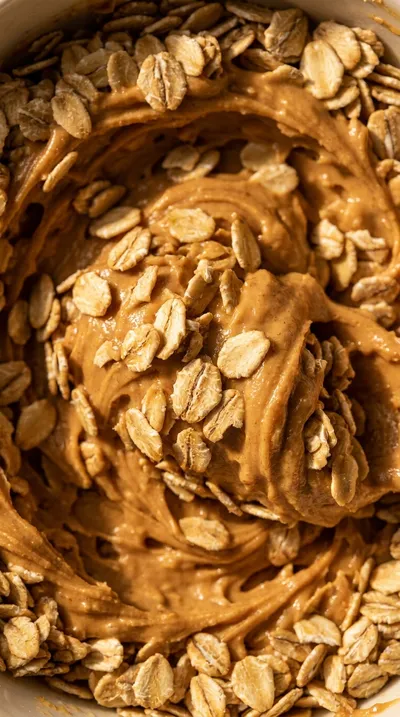
The Final Fold:
Once you stir in the peanut butter and vanilla, you quickly fold in the oats. You want every single oat coated in that glossy chocolate goodness before it firms up.
-
The Patient Wait:
Now comes the hardest part: letting them sit for 30-60 minutes. I know it's tempting, but they need to be completely firm before you peek at them.
-
Watch that clock—the 1-minute boiling time is essential for the cookies to set properly.
-
Work quickly once the oats go in, because the mixture sets up fast!
-
For a richer, smoother taste, I'd suggest using a Dutch-processed cocoa powder.
-
Don't try to move the cookies until they've cooled completely on the parchment paper.
Pro Tips
Just trust your instincts and enjoy the process!

Better For You Treats
Ways to Make it Your Own
Serving Suggestions
Frequently Asked Questions
→ Why are my cookies too soft and not setting?
Oops, that usually happens if the mixture didn't boil for the full minute. Just keep a close eye on the timer next time!
→ Can I use instant oats instead of quick-cooking oats?
I wouldn't recommend it, really. Instant oats are too fine and might make your cookies a bit too mushy.
→ How should I store these so they stay fresh?
Just pop them in an airtight container at room temperature for 3 days, or freeze them for up to 2 months if you made a big batch.
Nutrition Facts
per serving
210
Calories
4g
Protein
22g
Carbs
12g
Fat
Taste Profile
A rich, nostalgic blend of deep chocolate and salty peanut butter.
Ingredient Substitutions
Don't have an ingredient? Try these alternatives
Provides a slightly nuttier, milder flavor.
A simple swap for a dairy-free alternative.
Will result in a deeper, molasses-like flavor.
Recipe Variations
Try these delicious twists on the original
Chocolate Chunk Delight
For a bit of extra richness and a lovely crunch, stir in 1/2 cup of chocolate chunks—milk, dark, or semi-sweet—right along with the oats.
Minty Fresh
If you like that classic mint-chocolate pairing, just add 1/2 teaspoon of peppermint extract along with the vanilla extract.
Common Mistakes to Avoid
Learn from others' mistakes for perfect results
- Boiling for too long, which makes the cookies dry and crumbly.
- Not boiling long enough, which prevents the cookies from setting.
- Using instant oats instead of quick-cooking oats, affecting the texture.
Meal Prep & Storage
Make Ahead Tips
These can be made in advance and stored in an airtight container for 3 days or frozen for up to 2 months.
Leftover Ideas
Store any remaining cookies in an airtight container; if frozen, simply thaw them at room temperature before eating.
Perfect Pairings
Serve this with...
Cooking Timeline
Combine butter, sugar, milk, cocoa, and salt in the saucepan.
Bring to a boil and maintain for exactly one minute.
Remove from heat and stir in peanut butter and vanilla.
Fold in oats and drop spoonfuls onto the baking sheet.
Allow cookies to cool and set completely.
 Quick & Easy Everyday Recipes
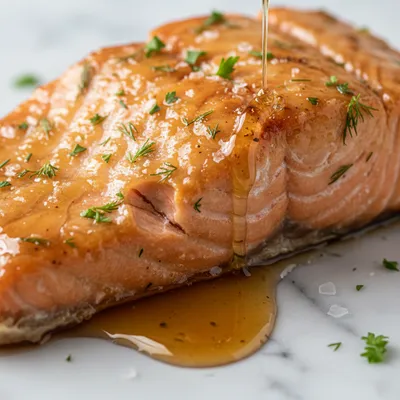
Honey Baked Salmon – Easy & Delicious
Honey‑baked salmon with a sweet‑savory glaze, ready in under thirty minutes.
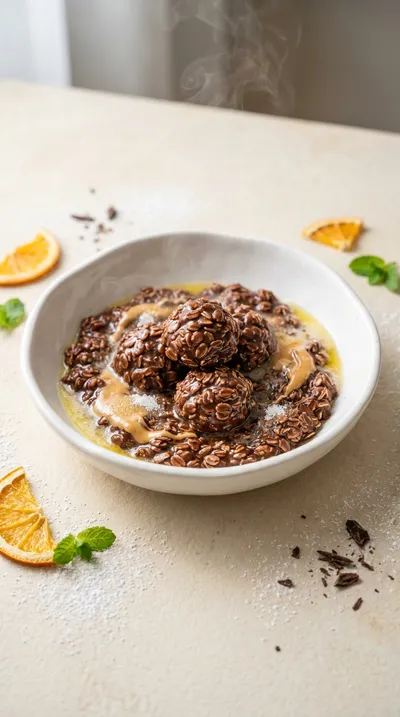
Classic No-Bake Cookies – Quick, Chocolatey & Addictive
These classic no-bake cookies bring together the rich scent of cocoa and creamy peanut butter for a chew that feels like a warm hug. They are a quick, chocolatey treat that requires no oven time, making them perfect for a quiet afternoon snack.
Timing
Prep Time
10 Minutes
Cook Time
0 Minutes
Total Time
10 Minutes
Recipe Details
Ingredients
The Base
-
01
1 cup (2 sticks/226g) unsalted butter
-
02
1 cup (200g) granulated sugar
-
03
1/2 cup (120ml) milk
-
04
1/4 cup (30g) unsweetened cocoa powder
-
05
1/2 teaspoon salt
The Mix-Ins
-
01
3 cups (360g) quick-cooking oats (not instant)
-
02
1 cup (170g) peanut butter (creamy or crunchy)
-
03
1 teaspoon vanilla extract
Instructions
Grab your large saucepan and gently combine the 1 cup (2 sticks/226g) unsalted butter, 1 cup (200g) granulated sugar, 1/2 cup (120ml) milk, 1/4 cup (30g) unsweetened cocoa powder, and 1/2 teaspoon salt. It's a lovely, rich start to the process.
Now, bring that mixture to a rolling boil over medium heat. Just be sure to stir constantly—well, honestly, keep that spoon moving—to make sure the butter is completely melted before it starts to bubble away.
Once it hits that rolling boil, keep it there for exactly 1 minute. I mean, exactly! Stir it continuously so nothing scorches. Timing this just right is the real secret to getting that perfect cookie texture we're after.
The moment that minute is up, remove the saucepan from the heat immediately. We don't want to overdo it, or they'll turn out a bit too crumbly.
Stir in the 1 cup (170g) peanut butter (creamy or crunchy) and 1 teaspoon vanilla extract. Mix it all together until it's completely smooth and looks just right.
Quickly fold in the 3 cups (360g) quick-cooking oats (not instant). Just be gentle but thorough, making sure every single oat is coated in that chocolatey peanut butter goodness.
While you're working, go ahead and line your baking sheet with wax paper or parchment paper so the cookies don't stick.
Drop spoonfuls of the mixture onto the prepared sheet—about 1-2 tablespoons each. Give them a little space so they have room to breathe.
Now comes the hard part: waiting. Let them cool at room temperature for about 30-60 minutes until they're firm. Look, don't be tempted to move them too early, or they might lose their shape!
Once they've set properly, just lift them off the paper and tuck them away in an airtight container.
Notes & Tips
-
1
Timing the boil is everything; just one minute is the sweet spot.
-
2
Quick-cooking oats provide the best chew; instant ones just don't hold up the same.
-
3
The mixture sets up surprisingly fast, so have your baking sheet ready to go.

Tools You'll Need
-
Large saucepan for melting and boiling the base
-
Wooden spoon or heat-resistant spatula for constant stirring
-
Measuring cups and spoons for precision
-
Baking sheet to hold the cookies as they set
-
Wax paper or parchment paper to prevent sticking
Must-Know Tips
-
Boil Time, Exactly one minute of boiling is essential for the cookies to set; too short and they're soft, too long and they're dry.
-
Speed, Work quickly when adding the oats and scooping the cookies because the mixture firms up fast.
-
Cocoa Quality, Using a high-quality Dutch-processed cocoa powder gives a much richer, smoother chocolate taste.
Professional Secrets
-
Precision timing of the rolling boil creates the chemical structure needed for a no-bake set.
-
Constant agitation during the boil prevents the sugar from scorching and the butter from separating.
-
Using quick-cooking oats instead of instant oats maintains the structural integrity and 'bite' of the cookie.

Recipe by
Mia CollinsSmall bites, big happiness 😋✨ Fun snacks, tasty treats, and flavor in every bite 🧆
Get Delicious Recipes Weekly
Join 25,000+ home cooks getting our best recipes straight to their inbox.
Free forever • No spam • Unsubscribe anytime