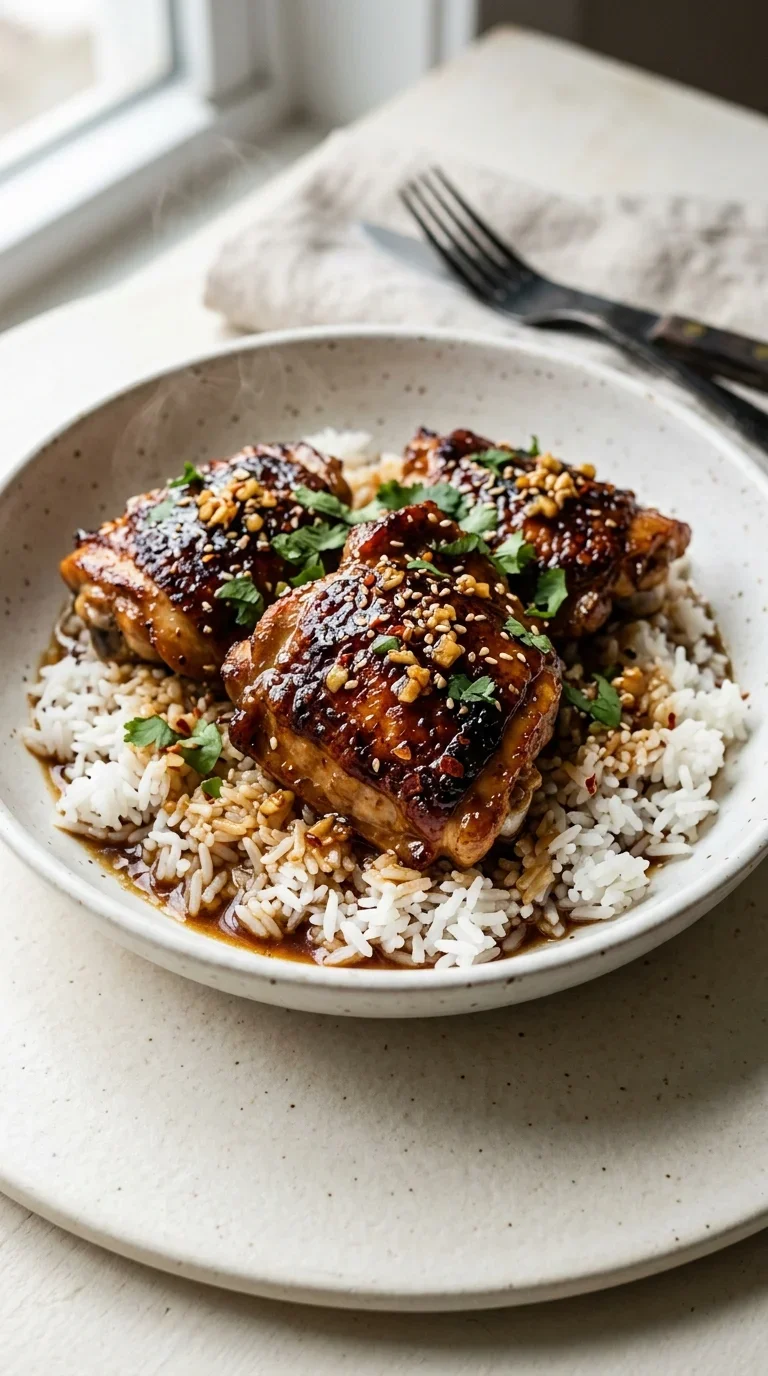
The marriage of honey, garlic, and soy sauce is a timeless nod to East Asian flavor profiles, where the balance of 'sweet and savory' is treated as an art form. While this specific version of sticky honey garlic chicken thighs is a modern, streamlined approach, it draws deep inspiration from traditional glazes used in Cantonese and Korean cooking to preserve meat and enhance depth.
Historically, honey was a prized luxury used to create a lacquer-like finish on meats, a technique that not only added sweetness but helped seal in the juices during high-heat cooking. The addition of ginger and garlic provides a sharp, aromatic contrast that cuts through the richness of the chicken thighs, creating a harmony of tastes that has spanned generations.
In contemporary home kitchens, this style of cooking has become a beloved staple because it bridges the gap between gourmet restaurant quality and the comfort of a home-cooked meal. It represents a global appreciation for the simple, bold ingredients that turn a basic protein into something memorable.
Why You'll Love It
-
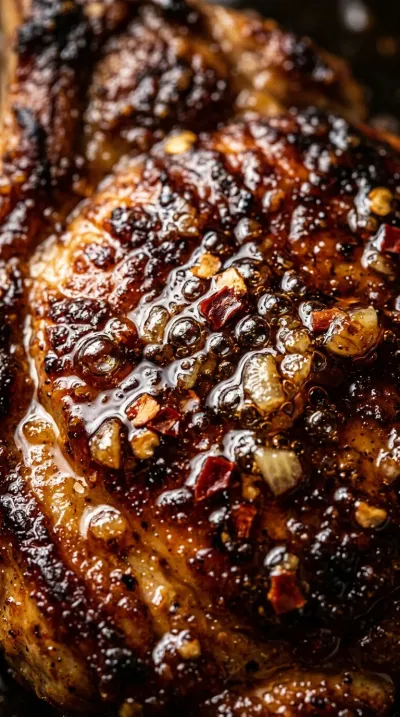
- Honestly, that glossy finish is just everything. It makes the chicken look like something from a fancy bistro, but it's actually just a little bit of honey and patience.
-
- I love how the skin gets all crisp and golden first. Well, look, there is just something so comforting about that crunch meeting a sweet-savory glaze.
-
- It's just so quick, yeah? You can have this on the table in 30 minutes, which is a lifesaver when the day just gets away from you.
-
- The smell of 4 cloves garlic, minced and sizzling in the pan... wow, it just fills the whole kitchen with a warmth that makes everyone head for the table.
"Honestly, the glaze is everything. My husband usually doesn't like honey in his dinner, but he practically licked the plate clean!"
Essential Ingredient Guide
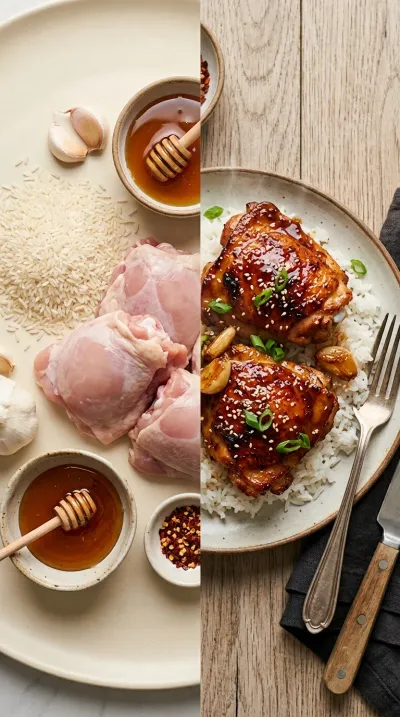
- 4 bone‑in, skin‑on chicken thighs (about 1 ½ lb): I always stick with bone-in; it keeps the meat so much juicier. Just make sure to pat them dry, or you won't get that lovely sear we're after.
- 4 cloves garlic, minced: Fresh is best here, honestly. I like to mince them just before they go in so the flavor is bright and doesn't get lost in the sauce.
- 1/4 tsp crushed red pepper flakes (optional): Now, this is just a little nudge of heat. It doesn't make it spicy, but it adds a nice depth that cuts through the sweetness.
- Salt, to taste: Don't be shy with the salt on the skin. It's the secret to getting that golden-brown color that looks so inviting.
- 2 tbsp rice vinegar: This adds a gentle tanginess. It balances out the honey so the dish feels light and balanced rather than just sugary.
- 1/4 cup honey: The honey is what gives us that beautiful, sticky coating. I remember when I first tried this; I was amazed at how it turns into a syrup right in the pan.

Complete Cooking Process
-
Getting Ready:
We start by prepping everything—whisking the glaze and patting the chicken thighs dry. It's much nicer to have your 1 tbsp freshly grated ginger and minced garlic ready to go so you aren't rushing once the oil is hot.
-
Building the Base:
The magic happens when we sear the chicken skin side down in 2 tbsp olive oil. That's where we get all those savory, browned bits in the pan that eventually make the sauce taste so rich.
-
Perfecting the Texture:
We simmer the glaze until it thickens, then return the chicken. Watching the sauce transform from a liquid to a glossy coat that clings to the meat is the best part, honestly.
-
The Final Glaze:
After the chicken is done, we let the sauce bubble for another two minutes. It turns into a thick, syrupy glaze that just looks stunning when poured over the top.
-
The Perfect Moment:
I always let the meat rest for a few minutes so it stays tender. Then, just a sprinkle of 2 scallions, thinly sliced and 1 tbsp toasted sesame seeds, and it's ready to enjoy.
-
Pat the chicken dry before searing; it ensures a crisp skin and prevents steam.
-
Use a silicone spatula to scrape the glaze into the pan—it catches every silky drop and prevents burning.
-
Let the cooked chicken rest for 5 minutes off the heat so the juices redistribute and the meat stays tender.
-
Keep an eye on the heat; a gentle boil for the glaze prevents the honey from scorching.
Pro Tips
You've got this, just take your time and enjoy the aromas!
Better For You Treats
This dish is wonderful because it's packed with protein from those chicken thighs. I mean, by using low-sodium soy sauce, we keep things a bit more mindful without losing any of that deep, savory flavor.
Ways to Make it Your Own
If you're feeling bold, try adding 1 tsp of sriracha for a spicy kick. Or, for something brighter, replace half the honey with fresh lemon juice and add 1 tbsp capers—it's a lovely, briny twist.
Serving Suggestions
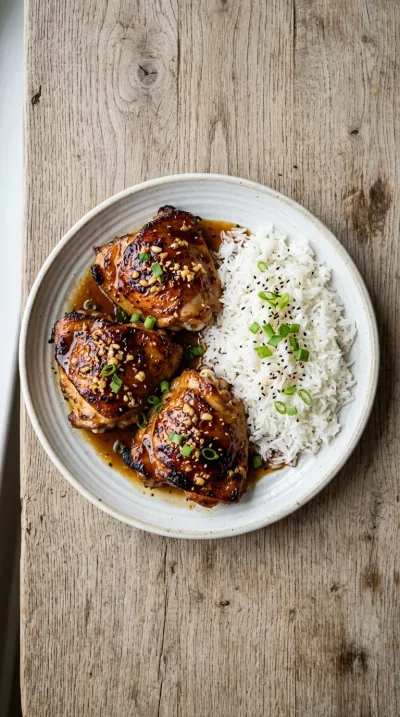
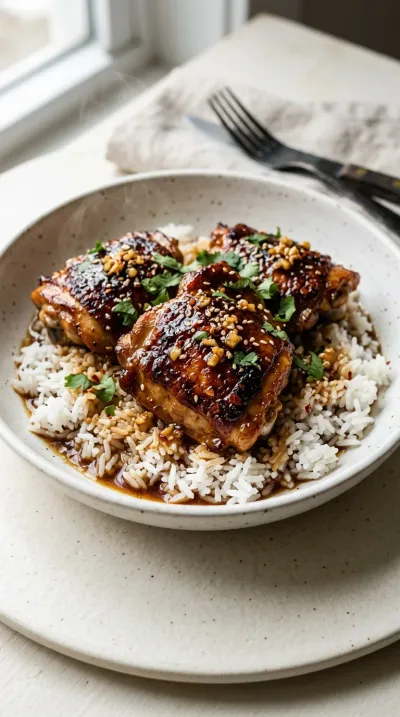
I usually serve this over a bed of steamed jasmine rice to soak up every drop of sauce. If you're skipping the grains, sautéed greens or cauliflower rice make it a lovely, light dinner.
Frequently Asked Questions
→ Can I use chicken breasts instead of thighs?
You can, but honestly, breasts dry out so much faster. Thighs are just more forgiving and stay tender in that bubbling glaze.
→ My sauce isn't thickening, what happened?
Oops, it might just need another minute or two! Keep simmering it on medium-low until it looks glossy and syrupy.
→ How do I store the leftovers?
Just pop them in an airtight container in the fridge for up to 3 days. When you reheat them, add a tiny splash of water to loosen the glaze back up.
Nutrition Facts
per serving
420
Calories
32g
Protein
22g
Carbs
24g
Fat
Taste Profile
A harmonious blend of sweet honey and salty soy with a bright ginger finish.
Ingredient Substitutions
Don't have an ingredient? Try these alternatives
Best for those making this gluten-free.
Gives a slightly more earthy sweetness.
A good pantry staple swap, though slightly more pungent.
Recipe Variations
Try these delicious twists on the original
Sriracha Honey Garlic Chicken Thighs
For those who like a little heat, just add 1 tsp of sriracha to the glaze. It gives a lovely spicy kick that balances the sweetness.
Lemon‑Caper Honey Garlic Chicken Thighs
If you want something brighter, replace half the honey with fresh lemon juice and fold in 1 tbsp capers for a briny contrast.
Common Mistakes to Avoid
Learn from others' mistakes for perfect results
- Searing wet chicken, which leads to steaming instead of browning.
- Leaving the glaze on high heat for too long, which can cause the honey to burn.
- Crowding the pan, which prevents the skin from getting truly crisp.
Meal Prep & Storage
Make Ahead Tips
You can prep the glaze in a jar up to 3 days in advance. Just shake it well before pouring it into the pan.
Leftover Ideas
Store in an airtight container in the fridge for 3 days. To reheat, use a skillet over low heat and add a splash of water to loosen the glaze back into a sauce.
Perfect Pairings
Serve this with...
Cooking Timeline
Dry and season the chicken thighs
Sear chicken skin-side down then flip and sear
Whisk glaze and simmer in the skillet
Return chicken to pan and simmer to thicken
Final glaze reduction and garnishing
Sticky Honey Garlic Chicken Thighs
These sticky honey garlic chicken thighs feature a glossy, golden-brown finish that clings to every bite. The scent of honey and garlic filling the kitchen makes these the ultimate comforting dinner for a busy weeknight.
Timing
Prep Time
10 Minutes
Cook Time
20 Minutes
Total Time
30 Minutes
Recipe Details
Ingredients
Main Ingredients
-
01
4 bone‑in, skin‑on chicken thighs (about 1 ½ lb)
-
02
2 tbsp olive oil
-
03
Salt, to taste
The Honey Garlic Glaze
-
01
1/4 cup low‑sodium soy sauce
-
02
1/4 cup honey
-
03
2 tbsp rice vinegar
-
04
1 tbsp freshly grated ginger
-
05
4 cloves garlic, minced
-
06
1 tsp sesame oil
-
07
1/4 tsp crushed red pepper flakes (optional)
Garnish
-
01
2 scallions, thinly sliced (for garnish)
-
02
1 tbsp toasted sesame seeds (optional)
Instructions
First things first, take a moment to pat the 4 bone‑in, skin‑on chicken thighs dry with paper towels. Honestly, it's a small step, but it makes a world of difference. Season both sides generously with salt and pepper so the flavor really sinks in.
Get your medium‑large skillet heating over medium‑high and pour in the 2 tbsp olive oil. Once it's shimmering—that's how you know it's ready—place the chicken skin side down. Sear them for 5–6 minutes until they're a lovely golden brown. Flip them over and sear the other side for another 4–5 minutes. Once they're done, just remove them from the skillet and set them aside for a bit.
While the chicken rests, let's make the magic happen. In a small bowl, whisk together the 1/4 cup low‑sodium soy sauce, 1/4 cup honey, 2 tbsp rice vinegar, 1 tbsp freshly grated ginger, 4 cloves garlic, minced, 1 tsp sesame oil, and those 1/4 tsp crushed red pepper flakes (optional) until it's all smooth.
Pour that glaze right into the skillet. Make sure to scrape up all those browned bits—that's where the depth is, you know? Bring it to a gentle boil, then turn the heat down to medium‑low. Let it simmer for about 2 minutes, then bring it back to a boil.
Now, return the chicken thighs to the skillet. Use a spoon to bathe them in that glaze. Let everything simmer for 4–5 minutes. You're looking for the sauce to thicken up and coat the chicken beautifully, and the internal temperature needs to hit 165°F.
Carefully transfer the chicken to a warm plate. Don't stop yet! Keep cooking that glaze in the pan for another 2 minutes. It'll turn into this gorgeous, glossy, syrupy finish that's just mouth-watering.
Pour the rest of that remaining glaze over the chicken on the plate. Finish it off with the 2 scallions, thinly sliced (for garnish) and 1 tbsp toasted sesame seeds (optional). Serve it right away while it's hot.
Notes & Tips
-
1
Patting the chicken dry is the secret to that perfect crisp skin.
-
2
Allowing the chicken to rest for 5 minutes helps the juices stay inside the meat.
-
3
The glaze thickens significantly in the final 2 minutes of cooking, so keep a close eye on it.
Tools You'll Need
-
medium‑large skillet for searing and reducing the sauce
-
small bowl for whisking the glaze ingredients
-
whisk to ensure the honey and soy sauce are fully combined
-
tongs for flipping the chicken thighs securely
-
measuring cup and spoons for precise seasoning
Must-Know Tips
-
Pat the chicken dry, it ensures a crisp skin and prevents steam.
-
Use a silicone spatula, it catches every silky drop of glaze and prevents burning.
-
Let the chicken rest, let the cooked chicken rest for 5 minutes off the heat so the juices redistribute.
Professional Secrets
-
Deglazing the pan: Scraping the brown bits (fond) into the glaze adds a rich, savory depth.
-
The Double-Boil Technique: Simmering then re-boiling the sauce creates a more stable emulsion.
-
The Glossy Reduction: Cooking the sauce separately after removing the meat creates a professional syrupy finish.
What readers are saying
Community reviews from home cooks like you
My new favorite way to make Sticky Honey Garlic Chicken Thighs. I really liked how the 4 bone‑in, skin‑on chicken thighs (about 1 ½ lb) and 2 tbsp olive oil came together. Thanks for sharing this one!
My new favorite way to make Sticky Honey Garlic Chicken Thighs. I really liked how the 4 bone‑in, skin‑on chicken thighs (about 1 ½ lb) and 2 tbsp olive oil came together. Great addition to my recipe rotation.
I wanted to love this dish, but it didn't quite work for me. My oven needed an extra 5 minutes. I think with some tweaks it could be really good.
I wanted to love this dish, but it didn't quite work for me. It took slightly longer than the recipe said. I think with some tweaks it could be really good.
This exceeded my expectations. I really liked how the 4 bone‑in, skin‑on chicken thighs (about 1 ½ lb) and 2 tbsp olive oil came together. Perfect as written.
Can't believe how simple this was. I really liked how the 4 bone‑in, skin‑on chicken thighs (about 1 ½ lb) and 2 tbsp olive oil came together. Thanks for sharing this one!
Nice base recipe. The lb) flavor was nice, but next time i'll double the sauce. I might try it again with some adjustments.
So easy and delicious. I really liked how the 4 bone‑in, skin‑on chicken thighs (about 1 ½ lb) and 2 tbsp olive oil came together. Thanks for sharing this one!
I wanted to love this dish, but it didn't quite work for me. I added a bit more seasoning next time. I think with some tweaks it could be really good.
This exceeded my expectations. I really liked how the 4 bone‑in, skin‑on chicken thighs (about 1 ½ lb) and 2 tbsp olive oil came together. Saving this for later.
This was a hit with my family. I really liked how the 4 bone‑in, skin‑on chicken thighs (about 1 ½ lb) and 2 tbsp olive oil came together. Saving this for later.
I wanted to love this dish, but it didn't quite work for me. The texture was a touch off, but the flavor saved it. I think with some tweaks it could be really good.
Will definitely make this again. I really liked how the 4 bone‑in, skin‑on chicken thighs (about 1 ½ lb) and 2 tbsp olive oil came together. I added a bit more seasoning next time. Already shared it with a friend.
So easy and delicious. I really liked how the 4 bone‑in, skin‑on chicken thighs (about 1 ½ lb) and 2 tbsp olive oil came together. Next time I'll double the sauce. Perfect as written.
I was surprised how good this turned out. I really liked how the 4 bone‑in, skin‑on chicken thighs (about 1 ½ lb) and 2 tbsp olive oil came together. I added a bit more seasoning next time. Great addition to my recipe rotation.
Good, but not amazing. The lb) flavor was nice, but i would reduce the salt a little. I might try it again with some adjustments.
The flavors were spot on. I really liked how the 4 bone‑in, skin‑on chicken thighs (about 1 ½ lb) and 2 tbsp olive oil came together. Great addition to my recipe rotation.

Recipe by
Alexa CarterFast food, but smarter 🔥🍽️ Bold flavors, simple steps, and meals that always hit the spot 😎
Get Delicious Recipes Weekly
Join 25,000+ home cooks getting our best recipes straight to their inbox.
Free forever • No spam • Unsubscribe anytime